Posted by Lyndi
Today we continue with the finale of my dad (“the Bella Vista Baker”) making artisan bread. Click here for Part 1, in case you missed it!
Dad’s words of wisdom: “Remember, the slower and longer the yeast rises, the better the flavor!”
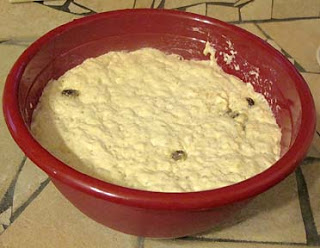
Take the dough out of fridge two hours before you begin this phase.
| “you want to bring the dough up to room temperature” |
FORMING THE BAGUETTE
1. Lightly flour the cutting board surface.
| “in our case, we’ll need extra because our dough is on the wet side” |
2. Roll dough gently on cutting board surface.
| “DO NOT KNEAD, POUND, OR PUNCH DOWN!” |
3. Gently form the dough.
4. Cut dough in half for two normal-sized baguettes.
| “I like small loaves, so I cut in four” |
5. Take each one and gently form into a cylindar shape.
| “be gentle” |
6. Cover with a towel and let it sit for 15 minutes.
| “it relaxes the gluten when it sits, so it’s not tough” |
7. Spray baguette pan with PAM spray.
8. Flour cutting board and roll baguettes in flour.
| “Be really gentle with it. If I find a raisin that sticks out, I push it back in so it doesn’t burn into a hard crisp when baking” |
9. Place in baguette pan.
| “Because this is a wet dough, the raisins pick up all the water so they stay big, fat, and plump.” |
10. Cover with towel again.
| “To keep “skin” from getting hard” |
11. Let rest for 30 minutes. It will rise a little bit more during this time.
12. Turn on oven and pre-heat to 450 degrees.
BAKING THE BREAD
Dad’s words of wisdom: “This bread has “oven spring” meaning when you put it in the oven, it rises about 25%. The moisture suddenly expands. It is not a rising of the yeast, it is the steam inside because it is so dense. The danger is that if it is too wet, the bread may split. Which only means it won’t look pretty.”
13. Set digital thermometer to 190 degrees and timer to15 minutes
14. Remove towel.
15. Turn on the hot water again
16. Gently brush room temperature water (with a soft brush) on the tops of the bread dough.
| “it helps it to get firmer. Do it GENTLY.” |
17. Sprinkle carraway seeds, seseme seeds, or any kind of seed you want on top!
| “options are endless, sometimes I use rolled oats or lemon zest” |
18. Cut diagonals GENTLY on top of bread about ½ inch deep.
| “If dough is too wet, you may “lose” your cuts” |
19. Put bread in oven.
20. Put shallow pan in oven … not a dark or non-stick pan, on the side of the oven away from the oven light. Pour 1 cup of boiling water into the pan.
| “This will produce steam and the crust will get hard. Be careful of your face, and don’t get any water on the oven light or it will break.” |
21. Lower oven temperature to 400 degrees.
22. Turn on timer and set to 15 minutes.
23. Clean up, throw away any flour you have left.
24. Set up cooling racks.
25. When temperature beeps, open oven and rotate pan.
26. Insert digital thermometer into middle of thickest loaf, leave in until it beeps (when internal temperature is 190 degrees.
| “takes a couple of minutes” |
27. Turn off oven, leave bread in the oven until thermometer reaches 200 degrees.
28. Remove bread from oven, place on cooling racks for 5 minutes.
29. Remove baguettes from pan and leave on cooling racks until they are cool to the touch. Takes about 1 ½ to 2 hours.
| “you can’t cut the bread when it’s hot” |
30. And the fun part… EAT!
| “I will wrap and freeze 3 of loaves but it must be absolutely cool before you wrap!” |
And there you have it. Step by step instructions on how to make your very own Artisan Bread.
Oh, I didn’t say it would be easy. You won’t catch me making it anytime soon.
But it was worth the time watching my dad bake, right? And it was worth my time spending it with him. Besides, half the fun of reading blogs is looking at the pictures, right?
Thanks Dad! I love you!


